Huy Cherie

Caption: Huy and Cherié with the Protective Trapper
The Protective Trapper : Venus Fly Trap Inspired Soft Robot
Project team member(s): Huy Nguyen and Cherié Francis
Introduction
The ultimate goal of this project is to build a robot, based on the structure of the Venus Fly Trap, that safely catches and protects objects that fall within it, as well as notifies a person when something is ensnared within the robot. We imagine that on a large scale robot, it could be used by firefighters to catch people who jump from burning buildings without inflicting injury. On a smaller scale, this could be to humanely ensnare small animals for study, or allow farmers to harvest and catch fragile crops. The benefit of creating a robot with soft elements, rather than just a conventional robot, is that it is less likely to hurt the objects that it holds.
Background
Developments in the soft robotics field are often inspired by biological forms. One such biological form that many researchers have tried to replicate is the Venus Fly Trap (VFT). In addition to it being soft, there are two main characteristics that define the VFT. The first is that it can autonomously actuate itself to grip objects, mainly small insects, as well as differentiate between different objects that may stray upon its trigger, allowing it to not waste energy on things that are not food [1].
One method that researchers have discovered in order to simulate these characteristics of a VFT is by using "a light-driven flytrap, that uses optical feedback to trigger photomechanical actuation" [1]. These use a layer of light-responsive liquid-crystal elastomers (LCE), which can both act as a trigger and power source for driving the actuation of an artificial VFT, independent of any computer or human aid. Another approach to mimicking the VFT is conducted by using ionic polymeric metal composite (IPMC), which act like artifical muscles actuated by an electric field when a mechanical disturbance affects it. By using different forms of the materials--IPMC trigger hairs and larger IPMC lobes replicating the VFT lobes, it was shown that the VFT lobes bending "shows a remarkable similarity with typical IPMCs bending in an electric field" [2]. Meanwhile, yet another group of researchers have taken advantage of the VFT's property of bistablity, the structural characteristic of the lobes of the VFT to be stable in either closed or open state, to wire shape memory alloy (SMA) onto "aymmetrically laminated carbon fiber reinforced prepregs," in order to actuate an artifical VFT upon trigger of a small bending of the lobes [3].
Construction
The Protective Trapper was constructed using items you can generally find in any normal household, that can still make a rigid but soft protector that won't damage objects that fall in it. It is therefore a relatively cheap robot that isn't too much of a hassle to build. The materials used and their approximate costs are listed below.
Materials Required
- Cardboard
- Two-way stretch fabric
- Foam
- Styrofoam
- Needle and thread
- Hot glue gun
- Stapler
- Masking Tape
Making The Robot
Constructing the Base:
- A 14x7 inch piece of styrofoam was measured and cut.
- Three 7x3 inch pieces were taped together then attached to one side of the large styrofoam base.
- Step 2 was then repeated but on the opposite side of the base.
Constructing the Robot:
1. A 5x7 inch rectangular piece of cardboard was measured then cut out. It was then folded in half then put aside to be the base of the robot.
2. Two trapezoidal pieces of cardboard were then cut out, the base measuring 7 inches with the top and height being 5 inches. Two foam pieces of this same size were also cut out.
3. At approximately 0.5 inches from the base of each trapezoidal piece, holes were punctured then a strip of fabric was threaded through.
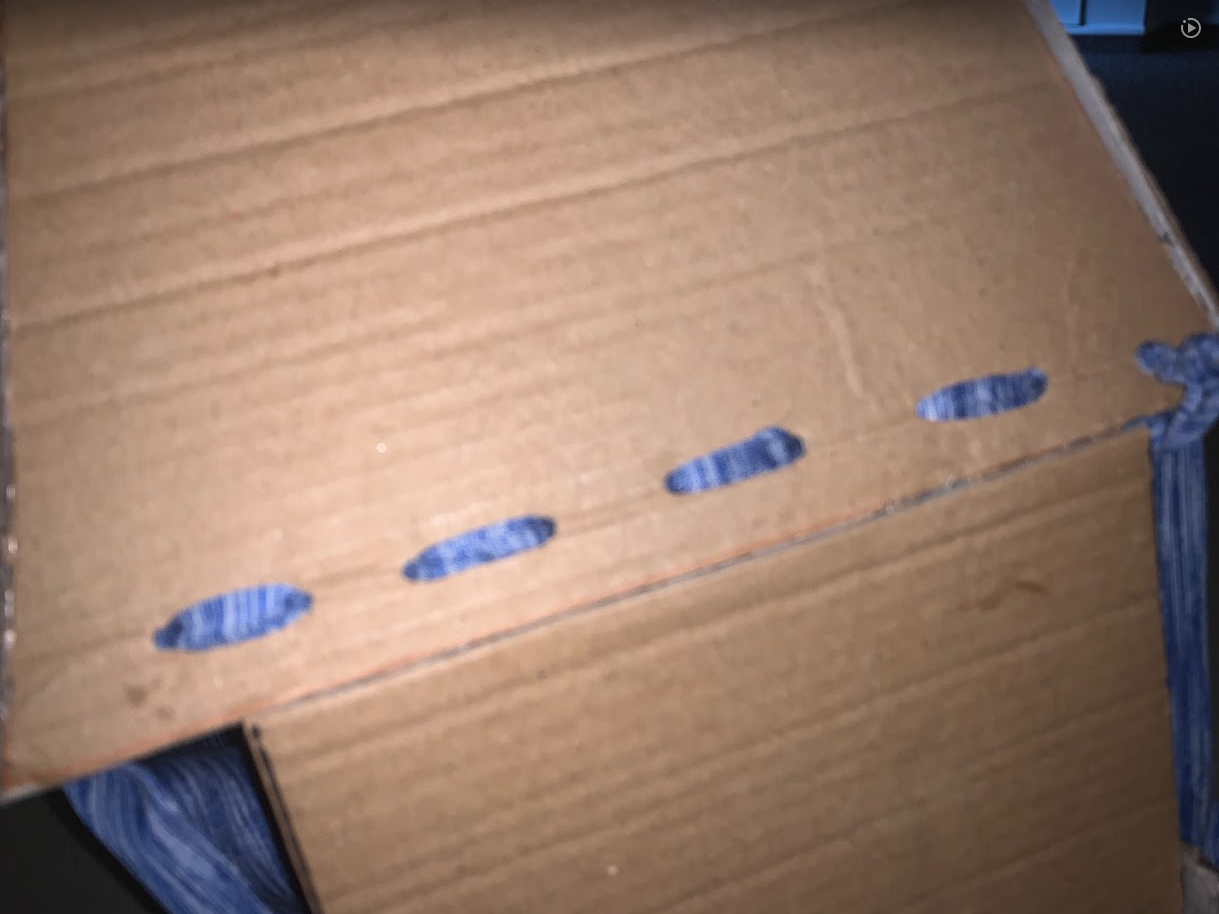
4. A 6 inch length of fabric was then sewed onto the two strips of fabric previously threaded through, attaching the cardboard pieces together.

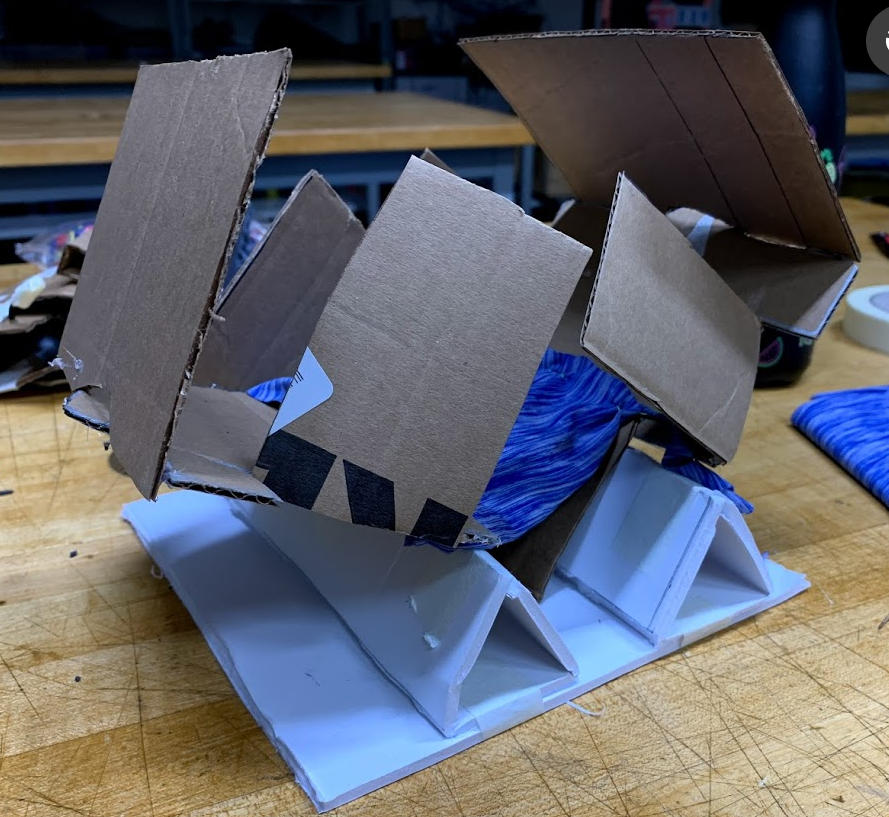
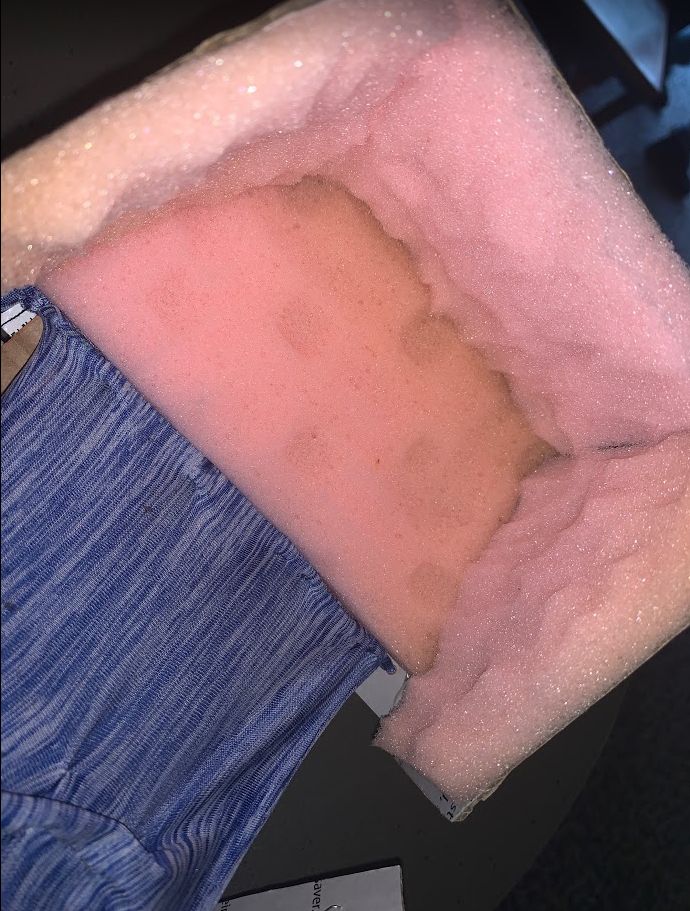
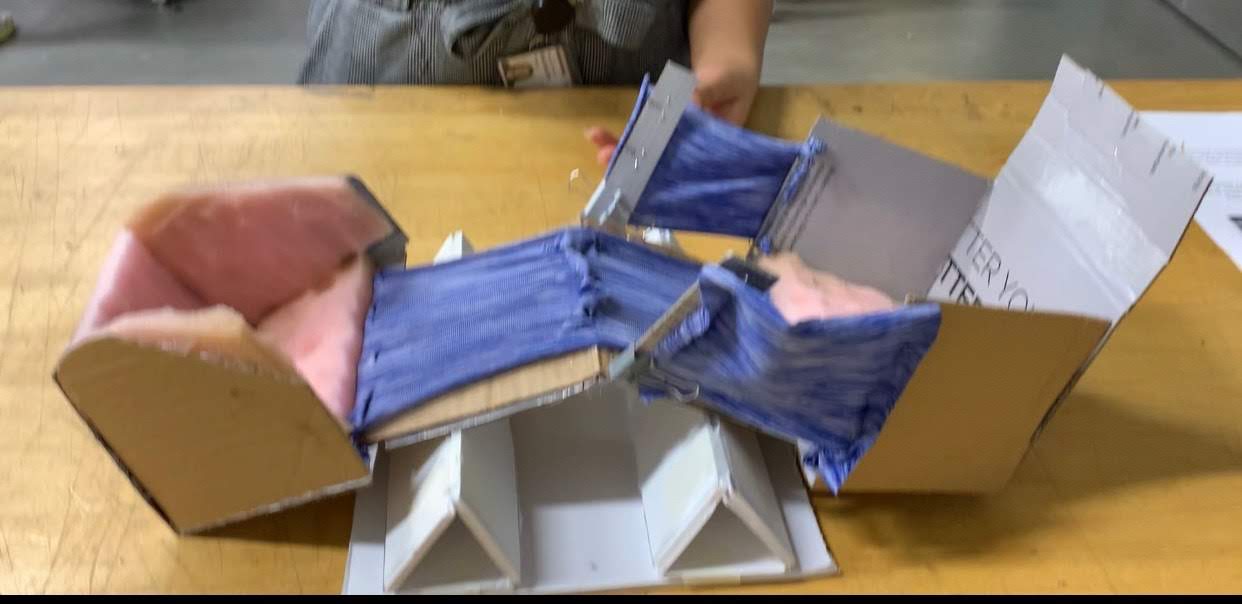
5. Underneath the fabric, the cardboard strip, previously designated to be the base of the robot, was then hot glued to the trapezoidal cardboard pieces. 6. Five 5x4 inch cardboard strips were then hot glued to each side of the trapezoidal structures, along with an additional 5x6 piece of cardboard, forming an enclosure. 7. Two foam pieces of the same size as the trapezoidal ones were attached on the inside of the enclosure along with a smaller pieces on the inside at the top and sides, to make the inside of the robot more protective.
8. To prevent objects from falling out at the side, two small strips of fabric were each attached to a 3x1 inch piece of cardboard then hot glued at the centre of the robot at each side.
Results
In the construction of the robot, the cardboard strip beneath the fabric bent in both directions, creating a bistable mechanism. When the robot was opened, at approximately a 270 degree angle, the fabric was stretched over the cardboard and was in an unstable state. Once a heavy enough object was dropped in the centre of the robot, the cardboard would bend in the opposite direction and the fabric would return to it's non-stretched state in a vey short period of time, resulting in a jump, causing the robot to close around the object. Without the base, the robot would jump to the side, but the base assisted in keeping it in an upright position.
During the testing and presentation, the mechanism only fully worked with the heavier objects from all distances dropped above the robot, but as for lighter objects, they had to be dropped from a high height in order to trigger the bistable mechanism. There is a very high probability that the robot didn't work or didn't work as well for lighter objects due to the robot being too heavy for a light object to trigger it.
If the design could be improved, we would make it out of lighter materials that would make it easier for light objects to trigger the mechanism. Before the additional enclosure components were added, very light object could in fact trigger the mechanism, however, due to the additional weight, they could no longer trigger it. By obtaining these lighter materials, that are still rigid but manipulative, the robot could possibly still protect smaller, lighter objects. As for the humanitarian mission, the robot was designed to catch falling objects, such as produce or safely trapping small animals for studies. With the change in the weight of the materials, the robot could catch and protect eggs, caterpillars or other light, delicate objects and organisms.
Acknowledgments
We would like to thank Allison, Lauren and Tita for their continuous support guidance and feedback throughout the duration of the project along with assistance in retrieving and choosing the right materials for the robot.
Files
Cost of Materials
- Cardboard ($1.69)
- Two-way stretch fabric ($4.00)
- Foam ($6.00)
- Styrofoam ($6.00)
- Needle and thread ($2.00)
- Hot glue gun ($2.00)
- Stapler ($2.00)
- Masking Tape ($0.89)
References
[1] A light-driven artificial flytrap https://www.nature.com/articles/ncomms15546
[2] Biomimetic robotic Venus flytrap (Dionaea muscipula Ellis) made with ionic polymer metal composites https://iopscience.iop.org/article/10.1088/1748-3182/6/4/046004
[3] Flytrap-inspired robot using structurally integrated actuation based on bistability and a developable surface https://iopscience.iop.org/article/10.1088/1748-3182/9/3/036004/meta
Checkpoint 1
The ultimate goal of this project is to build a robot, based on the structure of the Venus Fly Trap, that safely catches and protects objects that fall within it, as well as notifies a person when something is ensnared within the robot. We imagine that on a large scale robot, it could be used by firefighters to catch people who jump from burning buildings without inflicting injury. On a smaller scale, this could be to humanely ensnare small animals for study, or allow farmers to harvest and catch fragile crops.
Our goal for the first checkpoint was to prototype some mechanisms through which the robot would close, upon impact by a falling object. Ultimately, this would be a bi-stable mechanism, where just a small perturbation would trigger the whole system. This was done mainly using cardboard, paper, rubber bands, and cords.
(1) Cardboard and cord // Two flap design


(2) Paper and rubber band // Pyramid design

(3) Paper and rubber band // Cylinder design

Checkpoint 2
Our goal for checkpoint 2 was to complete a final prototype, with the finalized bi-stable mechanism which we intend to implement in our end product. We constructed this prototype using foam core for the base, and cardboard/two-way stretchable fabric for the trapper. We intend to encase our final product in silicone, to make it more softer and more protective.
Previously in our first checkpoint, the mechanism by which the robot closes is the movement of the knotted cord upon being impacted by a falling object. However, we believe that the spaces between the cords could allow small objects to fall through the robot. Additionally, it was too stiff, not allowing lighter objects to activate the robot.
Additionally, we tested different ways in which the robot could fully close on itself. In this iteration, we tried attaching cardboard flaps to the sides of the main gripper in order to fully allow the robot to close.